When I started in IT, I could fairly easily acquire knowledge on my own. I bought an Intel NUC, installed VMware ESX, virtualized a few Windows servers and clients, and built my own Citrix workspace solution. This allowed me to imitate a system administrator at home. However, the world and my field of work have changed significantly since then. The system administrator now stands next to the brontosaurus in the museum, and my NUC has a chipset that cannot run Windows 11. The market now demands DevOps Engineers and Cloud Engineers. But how can you gain this knowledge in an accessible way? Simple. GitHub, GitHub Actions, and Azure. CI/CD at your kitchen table.
Goal
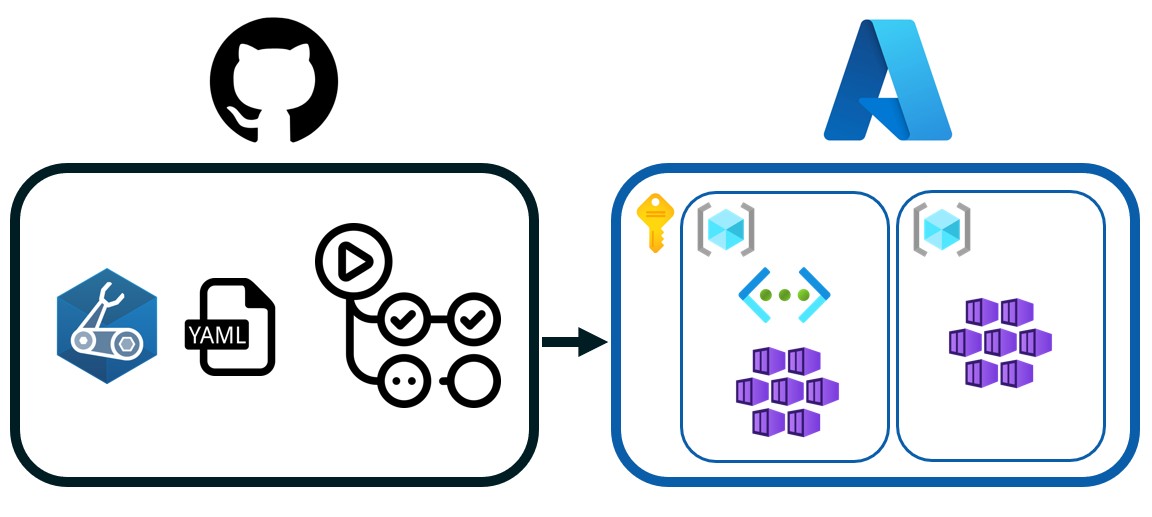
With this blog we want to create a simple CI/CD pipeline in GitHub Actions that deploys resources to Microsoft Azure. Purely to gain hands-on knowledge through experimentation.
Prerequisites
- Access to an Azure subscription;
- Permissions within Azure (create apps, assign rights to the subscription);
- A GitHub repository
Actions
To achieve a full deployment of resources in Azure, we will follow these steps:
- Authentication between GitHub and Azure 🔒
- Authorization of the App Registration ✅
- Create Infrastructure as
Code - Create a pipeline in GitHub Actions 🚀
1. Authentication between GitHub and Azure 🔒
When two parties interact, they must first identify themselves to each other. Here we need to establish a trusted relationship between Azure and the GitHub repository. We start in Azure.
Create an App Registration in Entra ID. The naming is entirely up to you. Then go to Manage → Certificates & Secrets. Click on the Federated Credentials tab. We will connect via OpenID Connect. The advantage of this method is that no password is required and access is only granted while the job is running. Click Add credential.
For the Federated credential scenario, select GitHub Actions deploying Azure resources.
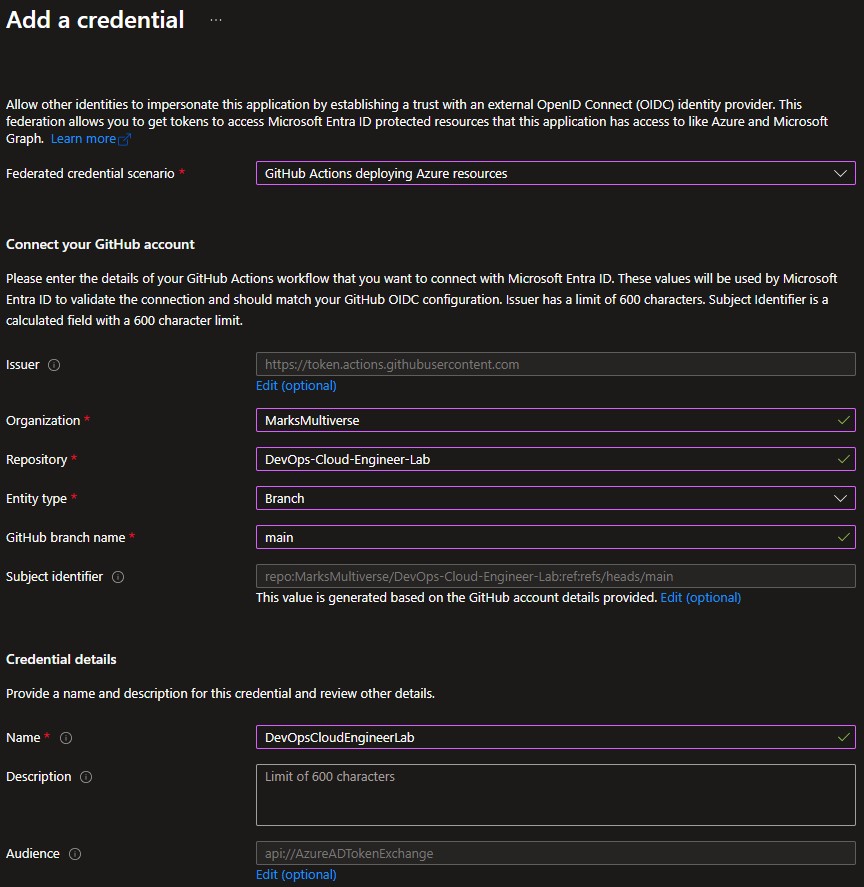
| Field | Value |
|---|---|
| Organization | Your GitHub username |
| Repository | The name of your repository |
| Entity Type | Branch |
| Based on selection | Main |
⚠️ Disclaimer Please note that Entity Type is Branch and Based on selection is Main are values that you don’t want to see in a production environment!
Under Credential details, enter the Name as you want the application to be called. The Description is optional. Click Add to create the application.
In GitHub, we will now register this application. Go to the repository you want to use. Click Settings. Click Secrets and variables under Security, then click Actions. Add the following repository secrets:
- AZURE_CLIENT_ID: Application ID of the app you just created;
- AZURE_SUBSCRIPTION_ID: Subscription ID of the target subscription;
- AZURE_TENANT_ID: Tenant ID of the target tenant.
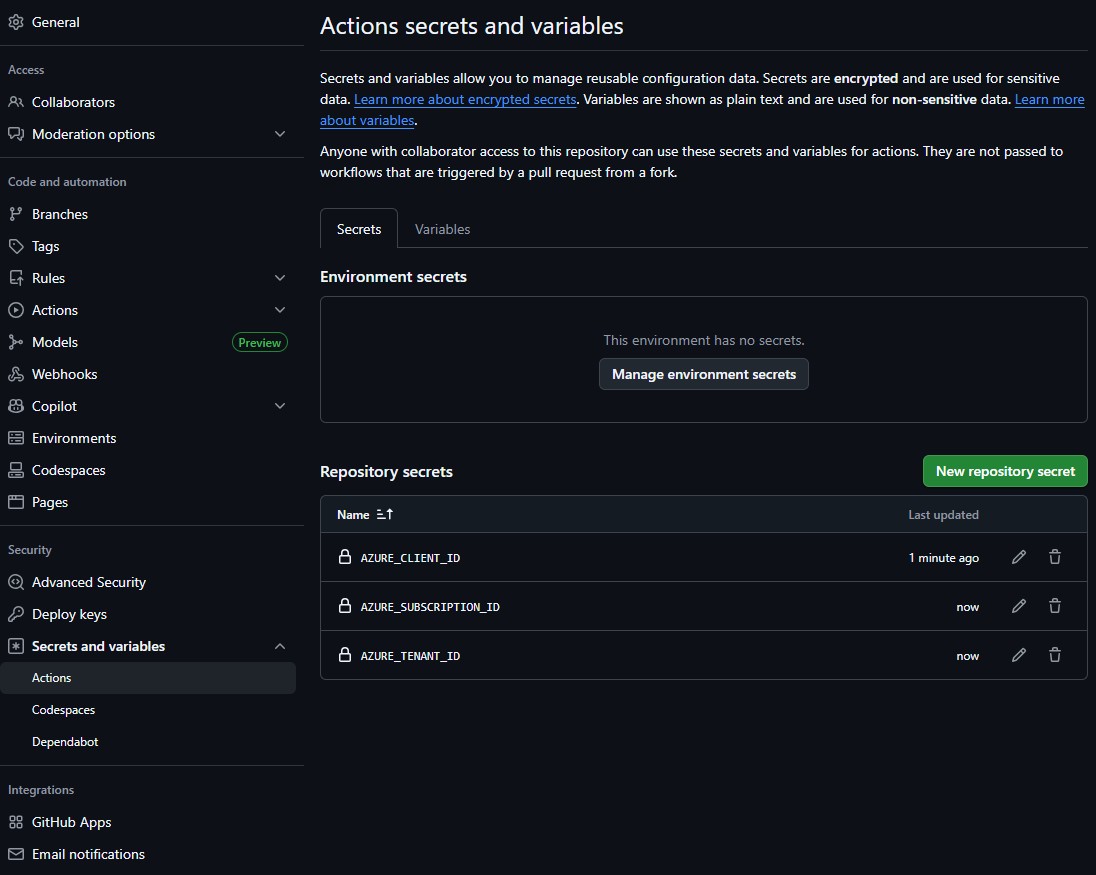
Simple as that.
2. Authorization of the App Registration ✅
Check whether your App Registration has the correct permissions on the subscription you want to use. The App Registration must have at least the Contributor role. If this is not the case, you need to fix this; otherwise, the deployment will fail. Keep in mind that if you want to assign role assignments on specific resources, you may also need additional permissions such as Owner or User Access Administrator.
3. Create Infrastructure as Code
Which resources do we want to deploy? Which building blocks do we define? In this example, we deploy a simple Hello World web application. Because we are deploying to Azure and want to keep it as simple as possible, we use Bicep.
The code you want to deploy is outside the scope of this blog. I chose a simple Hello World application running from an AKS cluster. This gives me tools to expand this concept further. The code is freely available on my GitHub.
 You could also choose a simpler setup, such as deploying only a Resource Group and a Storage Account.
4. Create a pipeline in GitHub Actions 🚀
To trigger a deployment to Azure from GitHub, a YAML file is required in the .github/workflow directory in the GitHub repository.
GitHub repository/
├── .github/
│   └── workflows/
│       └── random.yaml
This YAML file can have any name. We use one Ubuntu runner, so we define one job with multiple steps.
Let’s dissect the yaml file.
# (1) Name of the workflow shown in GitHub Actions
name: DevOps Cloud Engineer Lab

on:
  push:
    branches:
      - main          # (2) Trigger workflow on push to main branch
  workflow_dispatch:  # (2) Allow manual execution

permissions:
    id-token: write   # (3) Allow runner to request OIDC token for Azure login
    contents: read    # (4) Allow repository read access

jobs:
    devops-cloub-engineer-lab-build:   # (5) Job name
        runs-on: ubuntu-latest         # (6) Runner OS

        steps:
            - name: Checkout repository
              uses: actions/checkout@v3   # (7) Retrieve repository contents

            - name: Azure login
              uses: azure/login@v1
              with:
                  client-id: ${{ secrets.AZURE_CLIENT_ID }}
                  tenant-id: ${{ secrets.AZURE_TENANT_ID }}
                  subscription-id: ${{ secrets.AZURE_SUBSCRIPTION_ID }}
                  # (8) Login using repository secrets and OIDC

            - name: Create Resource Group
              id: rg
              uses: azure/arm-deploy@v1
              with:
                scope: subscription
                region: westeurope
                deploymentName: rg-${{ github.run_number }}
                template: ./modules/resourceGroup/main.bicep
                # (9) Deploy Resource Group using Bicep

            - name: Deploy Vnet
              id: vnet
              uses: azure/arm-deploy@v1
              with:
                scope: resourcegroup
                resourceGroupName: ${{ steps.rg.outputs.resourceGroupName }}
                region: westeurope
                deploymentName: vnet-${{ github.run_number }}
                template: ./modules/networking/main.bicep

            - name: Deploy AKS Cluster
              id: aks
              uses: azure/arm-deploy@v1
              with:
                scope: resourcegroup
                resourceGroupName: ${{ steps.rg.outputs.resourceGroupName }}
                region: westeurope
                deploymentName: aks-${{ github.run_number }}
                template: ./modules/aks/main.bicep
                parameters: subnetId=${{ steps.vnet.outputs.aksSubnetId }}

            - name: Get AKS credentials
              uses: azure/aks-set-context@v3
              with:
                resource-group: ${{ steps.rg.outputs.resourceGroupName }}
                cluster-name: ${{ steps.aks.outputs.clusterName }}
                # (10) Retrieve AKS kubeconfig

            - name: Install NGINX Ingress Controller
              run: |
                helm repo add ingress-nginx https://kubernetes.github.io/ingress-nginx
                helm repo update
                helm upgrade --install ingress-nginx ingress-nginx/ingress-nginx \
                  --namespace ingress-nginx \
                  --create-namespace
                # (11) Install Ingress Controller

            - name: Deploy Hello World app
              run: |
                kubectl apply -f app/helloWorld.yaml
                kubectl rollout status deployment/hello-world
                # (12) Deploy application workload

            - name: Deploy Ingress
              run: |
                kubectl apply -f app/helloIngress.yaml
                # (12) Expose application externally
Explanation
- The workflow is given a recognizable deployment name.
- The workflow starts automatically after a push to the main branch or manually via GitHub Actions.
- The runner receives permission to request an OIDC id-token for Azure authentication.
- Repository read permissions are granted.
- A single job is defined.
- The job runs on an Ubuntu-hosted GitHub runner.
- The repository is checked out using a standard GitHub Action.
- The workflow logs in to Azure using previously configured repository secrets.
- Infrastructure is deployed using Bicep templates.
- AKS credentials are retrieved to allow Kubernetes interaction.
- The NGINX Ingress Controller is installed using Helm.
- The Hello World application and its Ingress resource are deployed to make the application externally accessible.
After pushing to the main branch (or pressing the Run workflow button), you can monitor the deployment in your GitHub repository under the Actions tab. This is also the place to troubleshoot if something did not go as expected. This GitHub to Microsoft Azure through GitHub Actions setup provides a foundation that you can expand into your own home lab environment.